Are you looking to supercharge your Raspberry Pi 5 with lightning-fast storage capabilities? The MPS2280 PCIE M.2 NVME 2280 Gen3 SSD HAT is here to revolutionize your Pi experience. In this comprehensive guide, we'll walk you through the step-by-step process of installing this powerful SSD HAT onto your Raspberry Pi 5, unlocking a world of speed and efficiency for your projects and applications.
What You'll Need:
Before we begin, make sure you have the following items handy:
- Raspberry Pi 5
- MPS2280 PCIE M.2 NVME 2280 Gen3 SSD HAT
- M.2 NVMe SSD (compatible with 2280 form factor)
- Phillips screwdriver
- Thermal pads (included with the MPS2280)
- Internet connection for downloading drivers (if necessary)
Step 1: Prepare Your Raspberry Pi 5
Start by shutting down your Raspberry Pi 5 and disconnecting any power sources. This ensures a safe installation process without the risk of damaging your hardware.
Step 2: Mount the SSD onto the HAT
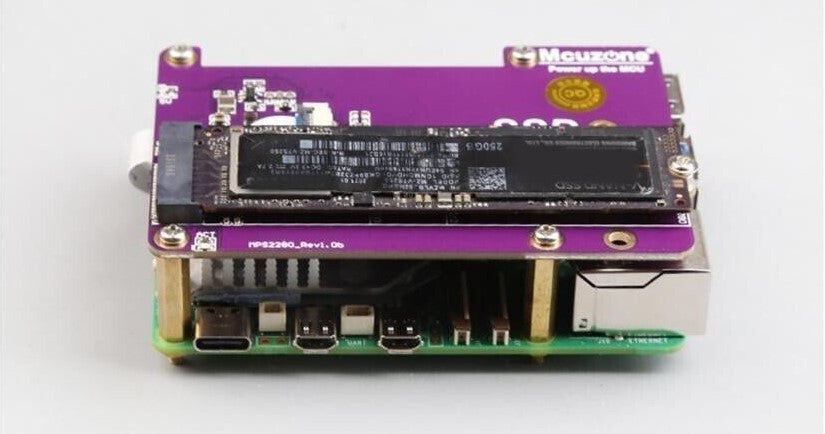
Carefully attach the M.2 NVMe SSD onto the MPS2280 HAT, aligning the connectors on the SSD with those on the HAT. Secure the SSD in place using the provided screws, ensuring a snug fit.
Step 3: Attach the HAT to the Raspberry Pi
Gently place the MPS2280 HAT onto the GPIO pins of your Raspberry Pi 5, making sure it is properly aligned. Apply gentle pressure to secure the HAT in place.
Step 4: Apply Thermal Pads
To ensure optimal heat dissipation, apply the thermal pads included with the MPS2280 HAT onto the SSD and any exposed components on the Raspberry Pi 5.
Step 5: Power Up Your Raspberry Pi
Once the HAT is securely attached, reconnect the power source to your Raspberry Pi 5 and power it on. The Raspberry Pi should detect the SSD automatically.
Step 6: Install Drivers (if necessary)
Depending on your operating system and SSD model, you may need to install drivers to fully utilize the SSD's capabilities. Check the manufacturer's website for the latest drivers and installation instructions.
Step 7: Verify Installation
To confirm that the SSD HAT is installed correctly, you can check the storage devices detected by your Raspberry Pi. Use commands such as lsblk or fdisk -l to view the available storage devices and partitions.
Step 8: Enjoy Lightning-Fast Storage
With the MPS2280 PCIE M.2 NVME 2280 Gen3 SSD HAT successfully installed, you can now enjoy blazing-fast storage performance on your Raspberry Pi 5. Whether you're running demanding applications, hosting a web server, or building a media center, this SSD HAT will elevate your Raspberry Pi experience to new heights.
Conclusion:
By following these simple steps, you can easily install the MPS2280 PCIE M.2 NVME 2280 Gen3 SSD HAT for Raspberry Pi 5 and unlock unparalleled storage performance. Say goodbye to slow loading times and hello to lightning-fast data access for all your projects and endeavors. Get ready to unleash the full potential of your Raspberry Pi 5 with this powerful SSD HAT!